Saturday, December 13, 2014

Jingle All The Way Banner

I saw a basic banner on Pinterest the other day that had the words Jingle All The Way and  I thought it was a cute idea, so I went to my studio and created this banner. Of course I had to embellish it and make it all pretty!


The only thing missing are little jingle bells. I did not have any on hand in my studio. Wouldn't that be cute though to have a little cluster of bells in between the stars? I will have to go on a hunt now for little bells.
  • I used the Apothecary Accents Framelit die for the Big Shot and Coaster Board to cut out the shapes for my banner. 
  • The words were cut using Typeset Alphabet for the Big Shot which is retired from the Stampin' Up! Catalog - that is what I had. I recommend using Little Letters which is a Framelit alphabet and available for purchase. It is on my wish list! 
  • The stars were from the Many Merry Stars Simply Created Kit as well as the wooden snowflakes and bakers twine.

  • The Real Red Satin Woven ribbon is just scrumptious and adds the finishing touch! 
My Stampin' Up! Supply List - click on product images below for more details and easy online shopping.

Friday, December 12, 2014

Christmas Banners

  • Banners are a fun way to decorate. Anything goes when it comes to creating one I think. They can be enjoyed year after year! 

  • I used my favorite designer paper - Under the Tree Specialty Designer Series paper from Stampin' Up! This is a nice cardstock-weight kraft paper. 
  • The embellishments - snowflakes, gold stars, silver sequins, bakers twine, came from the Many Merry Stars Simply Created Kit. This kit has a ton of embellishments leftover after making the star boxes. You can see the boxes in this post HERE
  • I used the Party Pennants Bigz die to cut out the banner pieces. This goes quickly as you can layer up to 4 pieces of cardstock and cut at one time! 
  • Deciding the layout is the most fun. I lay all the pieces out next to each other and then just start putting the embellishments in place. Once I decide it looks good, everything gets glued. 
Come back tomorrow to see the other fun banner I created to hang on my fireplace. 

My Stampin' Up Supply List - click on product images below for more details and easy online shopping. 

Monday, December 8, 2014

Many Merry Stars Simply Created Kit - Christmas Decor

  • I love, love, love the Many Merry Stars Simply Created Kit! This kit has enough supplies ( with leftovers for other projects ) to make 26, beautiful star boxes. See my previous post HERE to view the kit contents, more projects to create and watch a video on how to assemble these gorgeous boxes. 
  • Not only do these boxes make beautiful decor, they can be stuffed with chocolate and something small to be given as gifts, top a package or use as a place card. Recently I hosted supper club at our house and gave each of the ladies one of the med small boxes. They were thrilled! 
  • The boxes come with adhesive side strips, but I highly recommend using Sticky Strip as well just to make sure the boxes stay together. Also, the Multipurpose Liquid Glue comes in handy to adhere some of the accessories on the boxes. 
  • You still have a chance to order this kit in time for Christmas! 
  • Click on product images below for a description and easy online shopping

Wednesday, December 3, 2014

Christmas Gift Packaging

 It's time to think about pretty gift packaging! Here is a simple, yet beautiful way to give a gift. This uses the adorable Polka Dot Tag a Bag Gift Bags, gorgeous Cherry Cobbler 1" Sheer Linen Ribbon, my favorite designer paper - Under the Tree Specialty Designer Paper, the Petite Pairs stamp set, Star Framelits and my most often used Framelits, Bitty Banners. The star tag is held in place using one of the 2014-2015 In Color Clothespins.

My Stampin' Up! Supply List - click on product images below for more details and easy online shopping.

Monday, December 1, 2014

Monday Door Buster - HUGE savings!!

Today ONLY you can save BIG on select Door Busters - but hurry, it is only while supplies last! 


HUGE savings on Stampin' Up! Blendabilities!!!! ALL the color families ( except the skin tone and color lifter ) at a savings of OVER forty dollars! CLICK HERE  to learn more about Blendabilities and watch a video to learn a few tips on how to use them.

ALSO ON SALE UNTIL DECEMBER 2 - while supplies last


To view all of the products on sale and to order CLICK HERE ALL online orders during this sale will receive a free gift in the mail from me. Please make sure to NOT check no contact. I will not be able to see who ordered and mail you your gift.

Happy Shopping!

Wednesday, November 26, 2014

Rosette Tag & Bag, HUGE Sale and Weekly Deals

It is snowing here in PA today and I needed a break from the Thanksgiving prep, so I went to my studio - a place I love to be, and created this adorable bag. These bags are a perfect size when you just want to give a little something to someone. They are lined on the inside making them safe to put food in. Perhaps some homemade chocolate!

I used the Rosette Die from Stampin' Up! to make my rosette. This die is on sale right now until Monday, December 1 - a great bargain!

The die  has two different edges. Round or pointed. You choose which edge you want on your rosette. Putting the rosettes together is easy to do.

  1. Cut your cardstock or paper to the size you want for your rosette. My cardstock was 12" x 2". Lay it on the edge of your die and run through the Big Shot. For my size rosette I cut two pieces.
  2. This die cuts and scores. 
  3. Use Sticky Strip or a heavy duty adhesive to attache the pieces together after you accordion fold them. 
  4. Next, attach the ends so that you can form the rosette. 
  5. Using a glue gun is the easiest way to get your rosette to stay together. I use my silicone craft sheet for the next steps. 
  6. Form the rosette.
  7. Add a blob of hot glue onto the silicone sheet - the glue does not stick on the sheet. 
  8. Squish the rosette into the blob of glue and form. Hold for a few seconds until the glue holds. It can then be peeled off of the sheet easily. 
To finish the rosette, I stamped my greeting and banner cut the ends and attached with a glue dot. I used glue dots to adhere my gold sequins and also the pretty gold bow. I put the rosette on a Cherry Cobbler colored circle that was cut out using the Circles Framelits.

The bag was stamped using the snowflake from the Trendy Trims stamp set. I used Versamark Ink. 

I used the Banner Framelits to cut the large banner, adhered it to the front of the bag with sticky strip, just on the top so that the bag can be opened.The rosette was placed on top using dimensionls.


 My Stampin' Up! Supply List - click on product images below for more details and easy online shopping.


Check out the AMAZING deals from Stampin' Up! in this Extravaganza of a sale! 


Here are this weeks Weekly Deals! Check out the savings on the Rosette Die! 


Friday, November 21, 2014

Under The Tree Specialty Designer Series Paper Card Makeover


I posted this card back in October. You can see the  post HERE.  I did get positive feedback from the design but I felt it lacked something - maybe ribbon, or the greeting stamped on different cardstock. So I went to my studio and started playing around.

Isn't this better?? I changed the top layer piece so that it had a different design underneath - the green stipes. I think the contrast looks so much better! Stamping the greeting on Whisper White cardstock brightened the card up ( I did sponge the edges with Crumb Cake ink so it wasn't so bright ) and the added bow just makes it oh so cute!

Let me know what you think by leaving me a comment.

My Stampin' Up! Supply List - click on product images below for more details and easy online shopping.

Wednesday, November 19, 2014

The Newborn King

Glory To The Newborn King! This is a simple design layout that is quick and easy to make. 
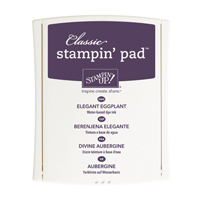
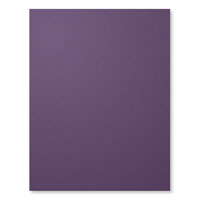
  • Elegant Eggplant card base - 5-1/2 x 8-1/2 - round two corners
  • Whisper White layer - 4 x 5-1/4  - emboss with Filigree Frame, round corners, stamp the star using Smoky Slate ink and the words in Elegant Eggplant. 
  • Ink main image with Elegant Eggplant ink, stamp on Whisper White and cut out using the Circle Framelits for the Big Shot.
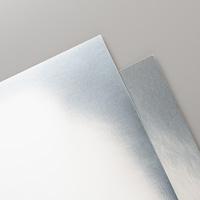
  • Cut another circle from the Silver Foil paper and layer the two together - use a dimensional to adhere.
  • Voila! A simple and quick card to assemble. 
Tip: you can put two pieces of cardstock in an embossing folder and run through the Big Shot at once. 

My Stampin' Up! Supply List - click on product images below for more details and easy online shopping.